Newsletter March 2021
President's Message
At last, after 12 months of Zoom meetings, we may be starting to see a return to normal on the horizon.
The 12 months have been challenge in many ways and we have seen major changes in our meetings:
On the negative side:
- We have not met in person for all that time.
On the positive side:
- We haves had many more shop tours and Show and Tells than we ever used to have.
- Guest speakers have not been limited to those who live in the Bay area.
- Attendees have also not been limited to those who live in the Bay area.
I would like to ask you how you would like to see BAWA meetings evolve in the future once the pandemic restrictions have been lifted?
In-person meetings:
- Would you prefer to have only live speakers or occasional Zoom presentations?
- Do you have suggestions for future presenters?
- Do you wish to consider a mixture of Zoom and in-person meetings in the future?
Paul has organized many very interesting Virtual Shop Tours during our Zoom meetings:
- Would you like these to continue?
- Are there topics you would like to add to our Virtual Shop Tours?
-Do the pre-prepared slides improve the presentations?
-Should we continue presenting in this way?
Also the number of our Show and Tells has expanded;
-Do you like the pre-made slide presentation Paul and the member put together for them?
How do you read our Newsletters:
- Computer? Tablet? Smart phone?
Enjoy your woodwork and we look forward to hearing your comments
Frank
(Contact at:
Frankramsay8@aol.com)
How do you read our Newsletters:
- Computer? Tablet? Smart phone?
Enjoy your woodwork and we look forward to hearing your comments Frank (Contact at: Frankramsay8@aol.com)
Top
March 2021 BAWA Zoom Meeting
The meeting was called to order by President Frank Ramsay.
Announcements:
Jon Kaplan mentioned that we have 37 paid members and we can always use more to help pay for our annual expenses.
New member John Eelm introduced himself, as did returning student member Mateo McCullough.
We had 46 people join us in this Zoom session, including members who had moved out of state.
Next month Ken Napier will talk about reproducing antique furniture.
Marquetry is made up of different colored woods cut and arranged to make a picture or pattern.
Parquetry is made up of different colored woods arranged to make a geometric pattern often seen on flooring. Intarsia a can include wood, stone and other materials carved and arranged with 3 dimensional effects.
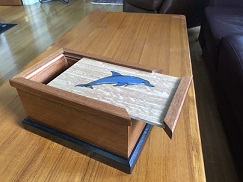
Marquetry typically uses thin veneers of various woods, some of which have been dyed with colors not naturally found in the wood. The veneers are often .05" thick.
The veneers are usually cut on a scroll saw, but can be cut by hand using a scalpel, or cut with a programmed laser cutter. When the cuts are made at an angle, two
layers of veneer are taped together and cut at once, with the resulting pieces fitting tightly together (double bevel marquetry).
The packet technique uses the saw set at 90 degrees and can have as many as 18 layers of veneer taped and nailed together and cut at one time. This requires a
thin saw blade to minimize the gap between pieces.
The hardest part of marquetry is the creation of the artwork or cartoon that will be the cutting pattern. Once the cartoon is completed, all the pieces should be
numbered and multiple copies made. The copies are then adhered to the veneers. When the pieces are cut out, they are laid down on masking tape that is sticky side
up. When you finally glue the pieces to a backing board, the pieces swell slightly and this helps diminish the gap between pieces that was created by the saw kerf.
When you want colored veneers, it is often desirable to buy commercially dyed veneer, which has the color all the way through the veneer and will not lose its color w
hen you sand the pieces.
Tom has attended classes put on by Paul Schurch and Patrick Edwards and he recommends these classes to anyone interested in learning more.
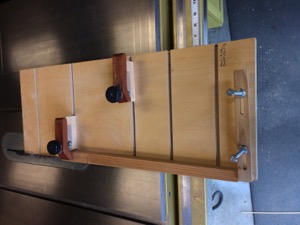
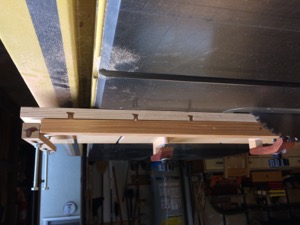
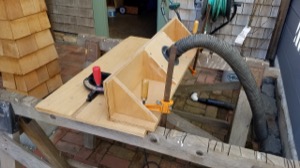
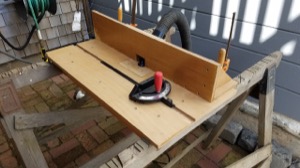
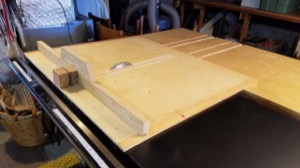
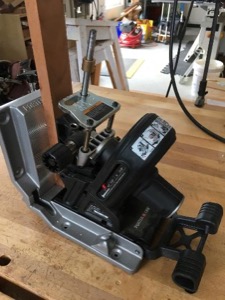
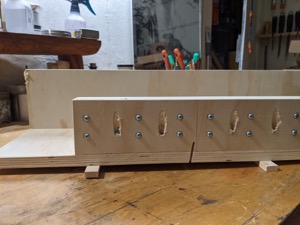
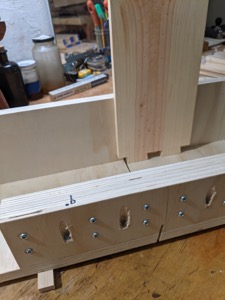
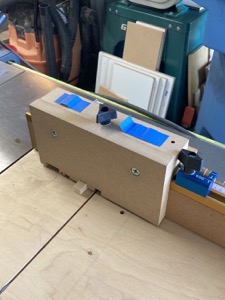
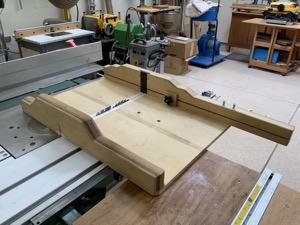
Here is my Taper Jig that is capable of tapering 1 to 4 sides.
The jig employs a 3/4" runner that fits into the saws miter gauge slot.
When completed, the jig is run through the saw leaving a 'zero clearance edge
that is used to line up the material to be tapered.
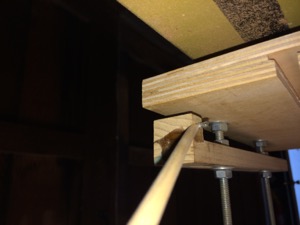
Several 'T-slots' to accommodate 'stop/hold
downs'
and the locating pin (Pic 3) help keep the
material locked in place
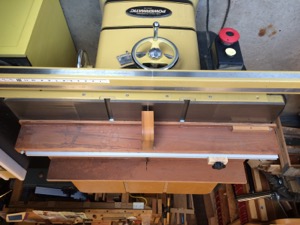
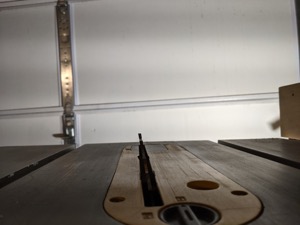
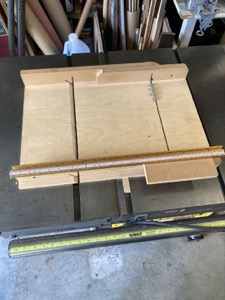
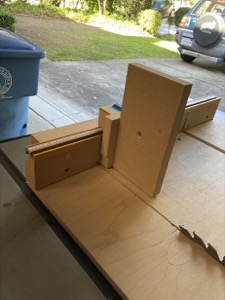
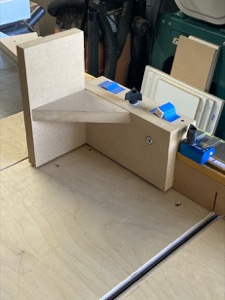
Plus This is my crosscut sled with adjustable stop.
John Hickman
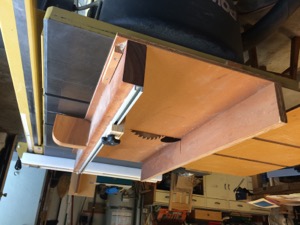
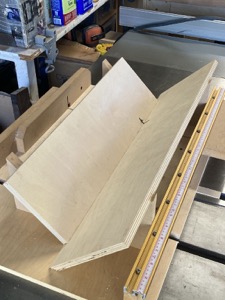
A table and adjustable fence for the router.
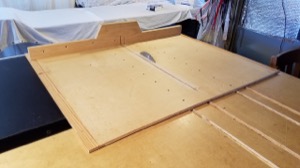
Crosscut sled for table saw. I built this sled some years ago when I had a different table saw, and I had to revise it upon acquiring my SawStop. (In the photo it appears that there is another kerf, parallel with, and about an inch away from the kerf in use. I filled that slot with an epoxy wood filler, but the photo makes it look like another kerf maintained for some unknown reason. The old, outfeed table attached to the table saw also contains the grooves that went with the prior table saw.)
Lloyd Worthington-Levy

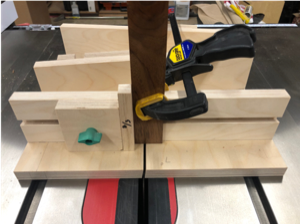


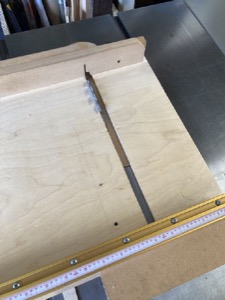
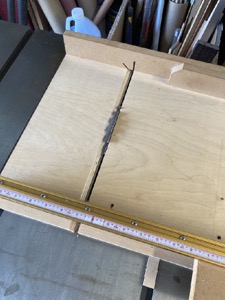
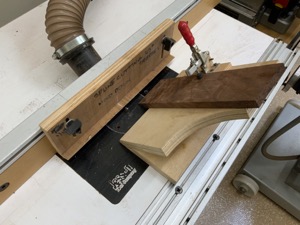
Dovetail Jig Uses flat top blade for pins, specially ground blade at 7 degrees for tails. Cuts dovetails that are symmetric on ends. Spacers used to set distance. Middle 7 degree fence has "fine adjust" feature to help set exact pin width.
Bill Henzel
Here is a my favorite pocket hole jig made by Porter CableV and a jig for ripping on a sliding table saw designed by Fritz and Fran from Germany.
Jonathan Axelrod
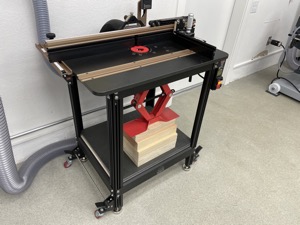
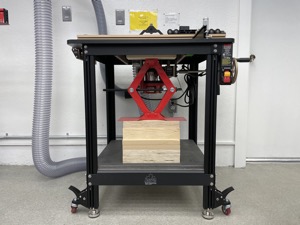
My router table is made by JessEm and has a solid phenolic top. When I bought the setup, I was relying on assertions from many sources that solid phenolic tops are so strong they stay flat, even when supporting the weight of a heavy duty router and lift. Alas, it was not true! While my JessEm setup is otherwise very nice, the phenolic table top sagged by a full 0.015" in the middle. That was enough to disrupt rabbets, etc. My solution has several parts:
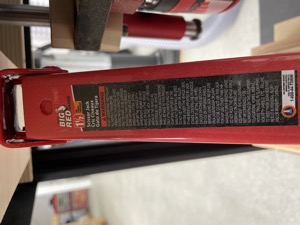
1. At the core is a 1.5 ton scissor car jack. It's so powerful that I can adjust the amount of force it applies using just my thumb and forefinger to turn the screw (at the point where you'd otherwise attach a lever if you were lifting a car). This allows me to dial-in the lifting force with great accuracy.
2. Below the jack, and its supporting stack of wood blocks, is a shelf made from 2 sheets of 1/4" steel plate (leftover from a different project). Each piece of steel plate is covered on both faces by self-adhesive mass loaded vinyl. The mass loaded vinyl is slightly soft and keeps the steel plate from rattling. It's also heavy.
a. The combination of steel plate and mass loaded vinyl adds approx 90 lbs to the stand -- down low where the weight helps to stabilize the entire set-up.
b. You could use wood instead of steel plate, of course. But, because wood is elastic and variable with humidity, etc., it would make the system less stable and require more frequent adjustment. It also would add less weight.
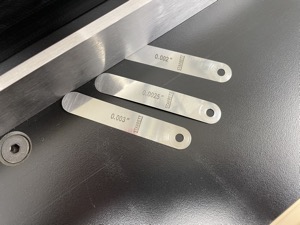
As you can see from the photos, the table top is now flat to somewhere between 0.002" and 0.0025". And, if it loses that degree of flatness (e.g., due to changes in the internal stress of the overall setup), I can re-establish that flatness simply by turning the screw on the jack.
As noted above, the steel plate was leftover scrap, but I think you could purchase it new from a local metal shop for $100 or less. The mass loaded vinyl is readily available in both large and small quantities (it's generally intended for noiseproofing, but I find it very useful around the shop). The jack cost $24.97 with free shipping on Amazon.
Perhaps the best thing about the jack approach is that you can use it to correct things that were flat when you made them, but have lost flatness with the passage of time. I plan to use it on my assembly table, which was pretty flat when I built it, but has taken a beating and now sags by about 0.05" in the center.
Jeffrey Fiore
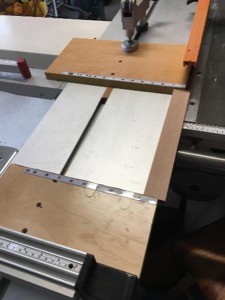
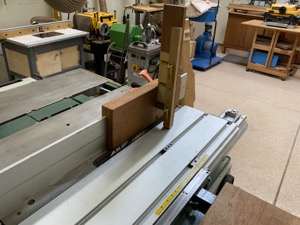
A table saw sled I recently made. Credits to Mike Peckovich of Fine WoodWorking magazine, who probably got it from somewhere else.
This is a sled specifically for cutting dovetails on the table saw.
- Requires a custom ground saw blade. - Mine has flat-top teeth ground to a 9 degree angle such that when I tilt the saw to the left, the top of the kerf is perfectly parallel to the "floor" of the sled and the end of the tails board which stands on-end against that tallish fence. - To use, just set the blade height to be a hair taller than the thickness of your stock, and cross cut your way to perfect dovetails. - Safe, precise, and fast - It helps to have a digital angle gauge like a Wixie.
Jon Kaplan
Multi-function crosscut sled
Adjustable zero clearance for dado blades
Move it to the other miter gauge slot for bevel cuts
Mount a micro-adjustable jig for cutting finger joints.
Replace the front plate to convert to a micro-adjustable tenon cutting jig
Or drop in a jig for cutting spline slots in the corners of boxes
John Blackmore
John Blackmore showed his crosscut sled with replaceable zero clearance inserts in both the base and the back plate.
He also showed a 45 degree jig for the router that is used to make hidden splines for mitered boxes.
He also showed a tenoning jig.
Top
Show and Tell
Lloyd Worthington-Levy
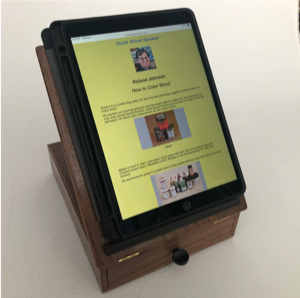
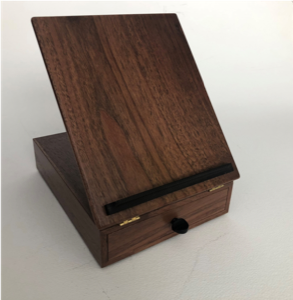
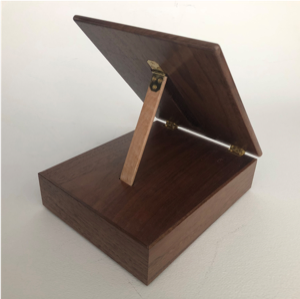
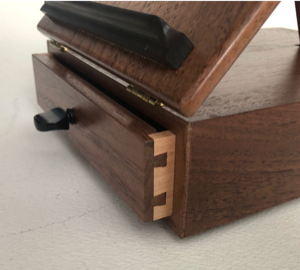
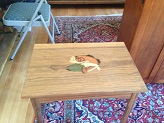
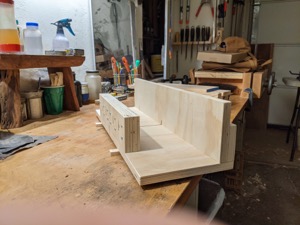
Lloyd showed his iPad support table made from walnut. It has a drawer with dovetailed front.
Bill Henzel

Bill Henzel showed his mobile vacuum cart
with 40 foot hose reel hooked up to his Dust Deputy and Festool vac.
He said the suction was still strong despite the 40 foot run of hose.
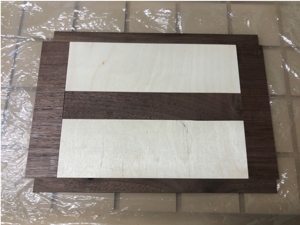
Jeffrey Fioree
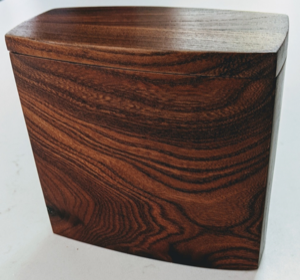
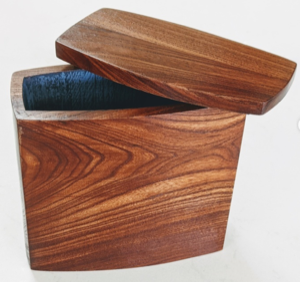
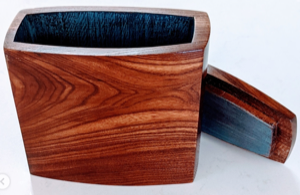
>
"I had a pair of small off-cuts from a beautifully figured piece of Walnut that were glued up to make a hunk about 2"x5"x6". I then followed Michael Cullen's (@michaelcullendesign) basic recipe for bandsawn boxes to yield this little gem. (Search YouTube for "Cullen Bandsaw box" if you are not familiar). I thought about trying some Cullen-style carving, but this wood was too perfect on its own, plus it is really hard to make it look like he does. I chose to leave the inside rough, but tried to refine the exterior as much as possible. The little flaw in the finish in the upper left corner was the result of dropping the box on some sandpaper during finishing. I didn't even notice it until I took these pics - thinking I got away with one, as I tend to do… The flaw has since been addressed. I used milk paint from Sinopia based here in the Bay (@sinopia_pigments) for the interior color in two coats: a thicker coat of the Sant'Anna blue with a thin coat of a custom blend of the same blue, blended with a touch each of their Chalk White and Verona Green. Very cool product I will continue to experiment with and support."
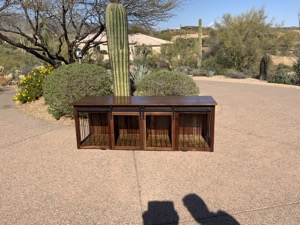
John Blackmore
RitzKennel for two dogs, double barn door
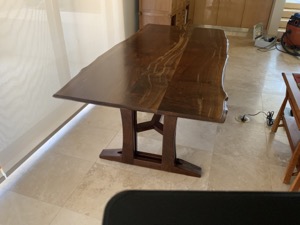

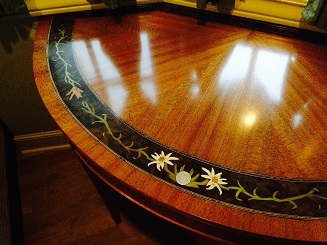
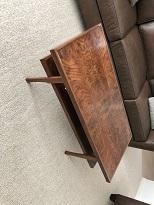
Claro walnut slab table with a live edge.