Newsletter January 2021
President's Message
Fellow woodworkers,
Next month's meeting will be our 11th Zoom meeting.
We have not been able to meet together in-person since last February but this is not been as bleak as it seems.
The recent guest speakers we have had for our Sunday evening presentations have been from the south and north areas of California to the east coast. Speakers we would not normally have had access to.
Guests who could not attend our regular meetings in Foster City have been joining us on-line: ex members who now live on the East coast and people who live in the Bay Area but a long drive from Foster City.
I am not going to attempt to guess when we will resume in-person meetings but, when we do, our plan is to have them also available on-line via Zoom so we will not be limited to speakers and members who can join us physically.
If after all these months are you struggling for ideas for your next project?
I suggest you look at the BAWA Galleries that are available from top menu of our website's opening page. You will find photos from all of our previous 6 shows plus a Members Gallery section. I have not counted, but I suspect they contain pictures of several hundred projects there. Remember that Woodcraft and other wood and tool suppliers are still open (please confirm this before you go as we live in a time of fast-changing rules)
The other bit of news is membership fees can now be paid through PayPal.
Just log in to your PayPal account and make the payment to: member@bayareawoodworkers.org
Enjoy your woodwork Frank (Contact at: Frankramsay8@aol.com)
Top
January 2021 BAWA Zoom Meeting
Announcements:
The meeting was called to order by President Frank Ramsay.
32 people participated in the meeting, including invitees from Diablo Woodworkers.
Jon Kaplan mentioned that we have 28 paid members and we could use more to help pay for our annual expenses.
Next month we hope to have Darrel Pert talk about Green and Green furniture.
Guest Virtual Speaker
Roland Johnson
How to Color Wood
Roland is a contributing editor for the Fine Woodworking magazine and has been for many years.
He started out restoring antiques and eventually started making his own furniture. He only uses solvent based finishes, water based finishes are too hard to repair if they are damaged. He never uses polyurethane for the same reason.
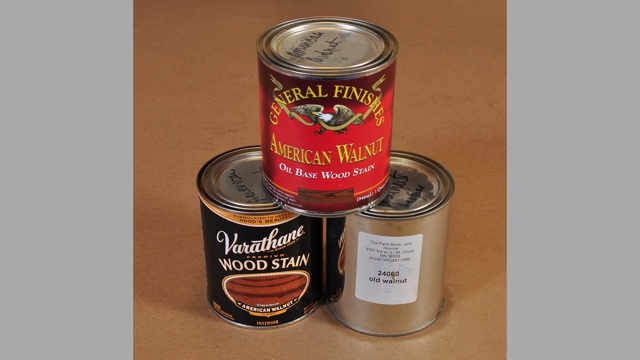
Stains
Maple is hard to stain, open grain wood stains the best. He recommends General Finishes brand stains. Varathane is OK. Minwax is not recommended for high end finishes.
He recommends going to a paint store to buy quality finishes, avoid the big box stores.
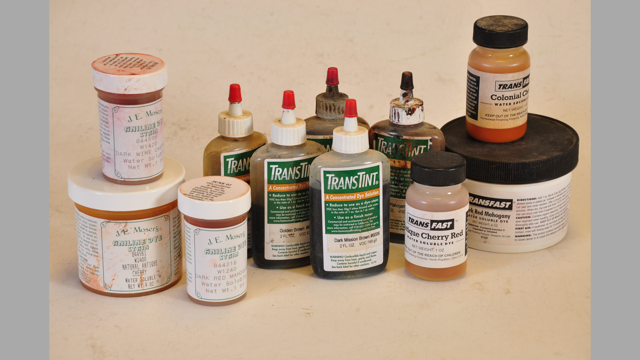
Tints and Dyes
Dyes have finer pigments than stains and can be water based. Dyes are well suited to woods like maple. Trans Tint is one of Roland's favorites. He mixes the Trans Tint with distilled water. Never use tap water. Red stain will not fade as fast as red dye when exposed to the sun.
Reactive dyes create uniform coloring. You can make white oak look like ebony with ferrous acetate dye. He made a point of telling us not to use Potassium Dichromate which is toxic.
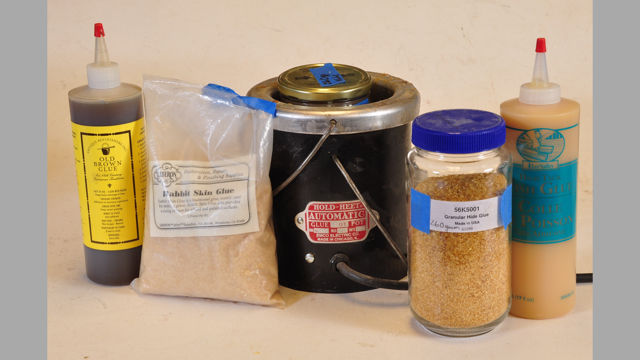
Glues and finishes
Final sand with 400 grit if using a die on maple. 180 grit is fine for wood that will be stained. Final sanding should be in the direction of the grain.
Prepping wood for stain: vacuum up the dust after sanding, do not use compressed air to blow off the dust. Use paint thinner or mineral spirits to go over the
wood surface prior to finishing to reveal any dried glue, insufficiently sanded surfaces or other imperfections.
Roland recommends Titebond Original and Hide Glue for gluing. He found Titebond II unsatisfactory. Vinegar can be used to remove glue stains. Hide glue
requires heating in a glue pot, but stains can be removed with hot water.
Dents in wood can often be steamed out rather than filled with a filler. When a filler is needed, make your own by mixing sawdust with Hide glue or use tinted Bondo.
Roland recommends the book Adventures in Wood Finishing by George Frank if you can find it.
He uses shellac to pretreat woods like curly maple and carved pieces where end grain will show. Use an electronic scale (available at Shellac.com) to weigh out
the shellac when you mix it.
Take notes when creating finishes so you can duplicate the finish later on.
Roland recommends the book Adventures in Wood Finishing by George Frank if you can find it.
He uses shellac to pretreat woods like curly maple and carved pieces where end grain will show. Use an electronic scale (available at Shellac.com) to weigh out the shellac when you mix it.
Take notes when creating finishes so you can duplicate the finish later on.
Top
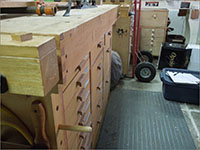
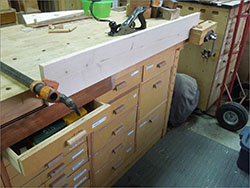
Virtual Shop Tour
Jon Kaplan showed photos of member's work holding devices.
Llyod Worthington-levy
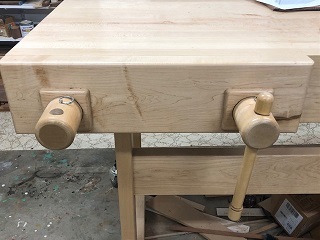
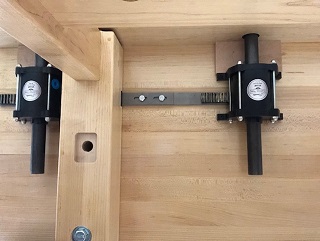
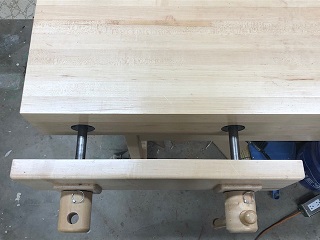
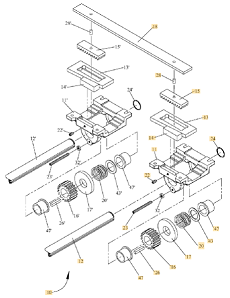
Hovarter vise
This particular vise is unusual in that it uses cam action instead of screws, allowing both a quick release to adjust the jaws and the ability to accommodate work that is not perfectly parallel.
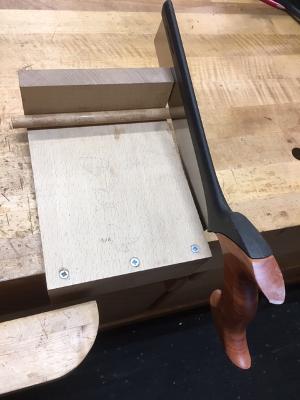
New member Jeffrey Fiore
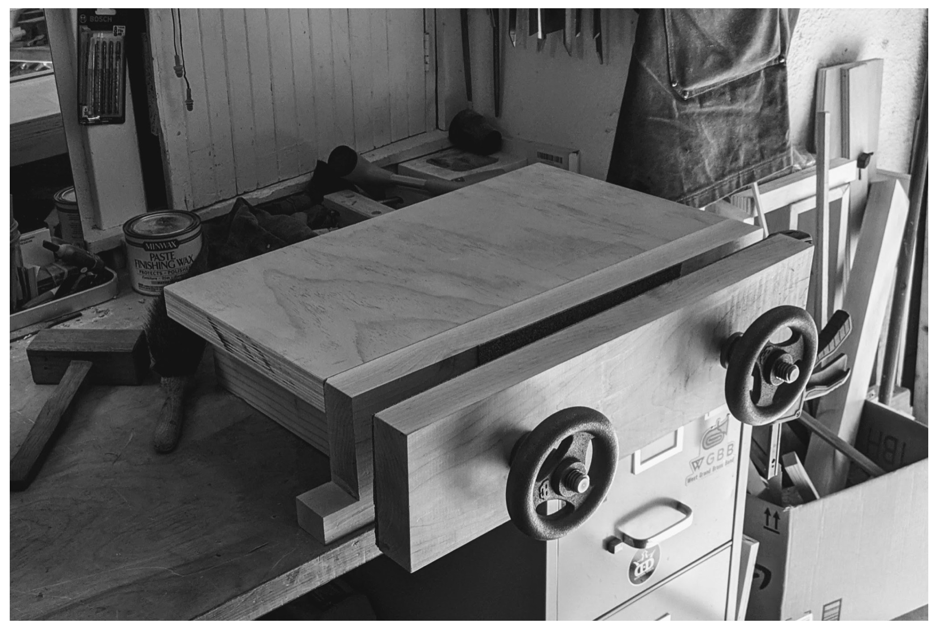
Jeffrey showed off his Moxon vise
The top is just two pieces of plywood glued together and fastened to the frame with pocket screws. The frame used simple lap joints to connect the sides with two stretchers that keep it square, support the top, and enable it to be attached to the fixed jaw. I chose to hand-chop nearly 1″ deep hexagonal mortises into the fixed (inner) jaw for the 3/4″ nuts that secure the precision rolled carbon steel screws. That took the bulk of the time and included a sharpening session. This was a fairly quick and dirty build, my goal here was clamping power, not perfect fit & finish. It is square, sturdy, and strong – all I need for now. Someday I may re-build with different dimensions, all solid hardwood and more elaborate joinery.
The hardware from Benchcrafted was flawless. My one complaint is that they did not include enough of the Crubber material to completely cover the jaws as they were specified in the plans on their website. You can see I opted to cover the full clamping surface of the movable jaw, but only the center of the fixed.
Build Detail: Benchcrafted hardware ($160 as x-mas gift) $32 worth of 8-quarter maple $5 8' 2×4 from Ace (milled to square with dust cuts on the table saw, glued up to be double wide) Some left over Baltic birch About 6 hours, a handful of screws, yielded clamping nirvana
Yeung Chan
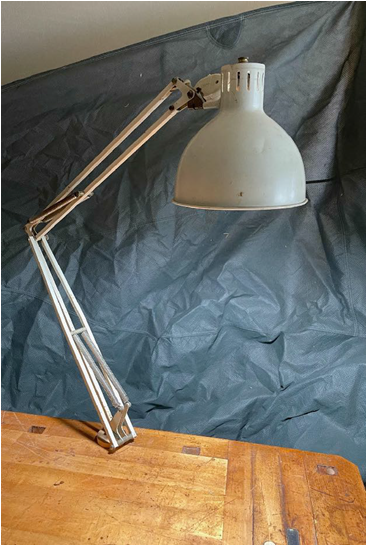
Lamp Holder
Yeung showed a bench dog with a hole in it so that he could put his swivel lamp into the hole and position anywhere on the bench.
He also showed a modified bench dog that works with a standard F-style clamp to secure work.
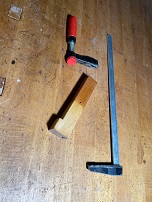
Bill Henzel
Bench hook
Bench puppies
Multi router clamps
Bill showed his Multi-Router clamps from Woodpeckers Bench puppies and a bench hook from a Fine Woodworking article.
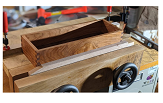
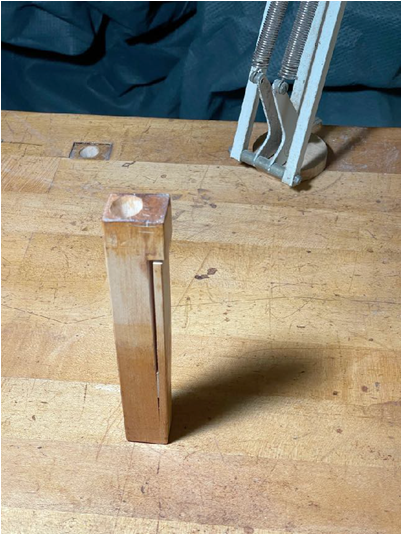
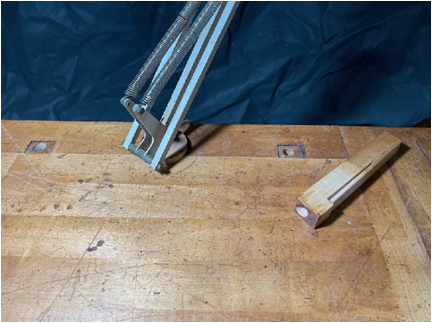
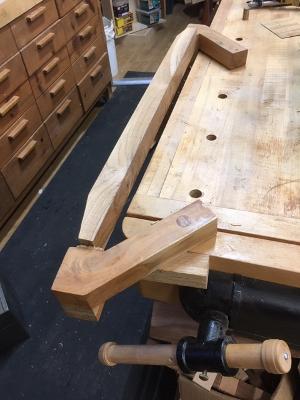
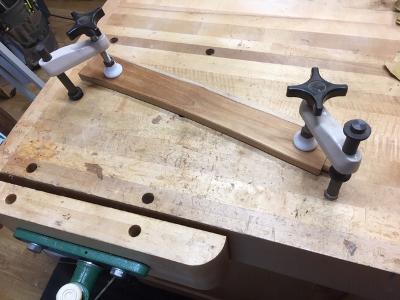
Ken Napior
Peg for supporting the end of a board
I tend to use a drawer for support instead. Drawers are spaced at various heights and distances from the vice, making planing different size boards very easy.
Ken showed his bench puppies and a vise consisting of three pieces that form a wedge to hold strips of inlay as small as 1/8".
Top
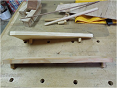
Two sections of the jig
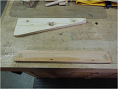
Two sections with dogs inserted into bench
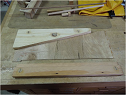
Third piece added to accommodate
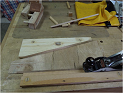
Walnut workpiece added, which I can plane to 3/32"x1/8" or any width I need
Planing very thin wood strips for inlay or other small pieces of wood
The real bench dog
Show and Tell
Bill Henzel
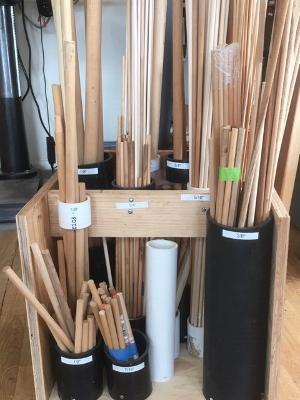
Dowel storge
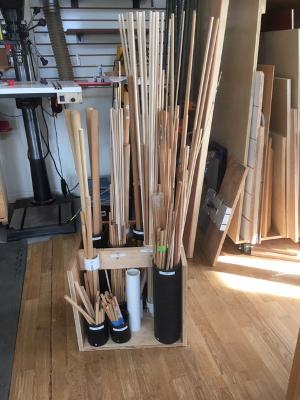
Dowel storage
Bill showing off his PVC and ABS pipe holders for his dowels.
Harry Filer

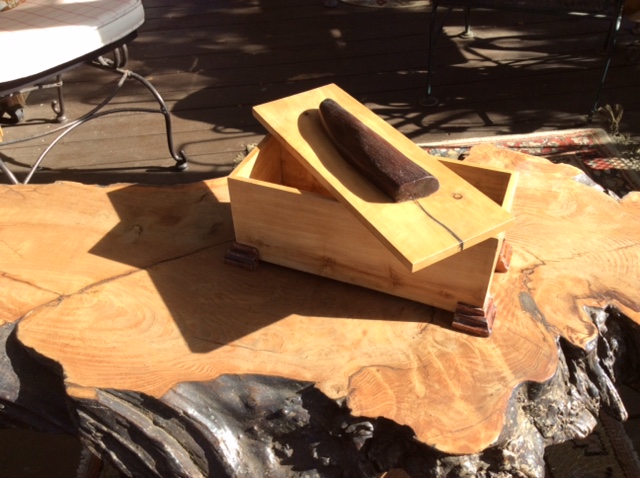
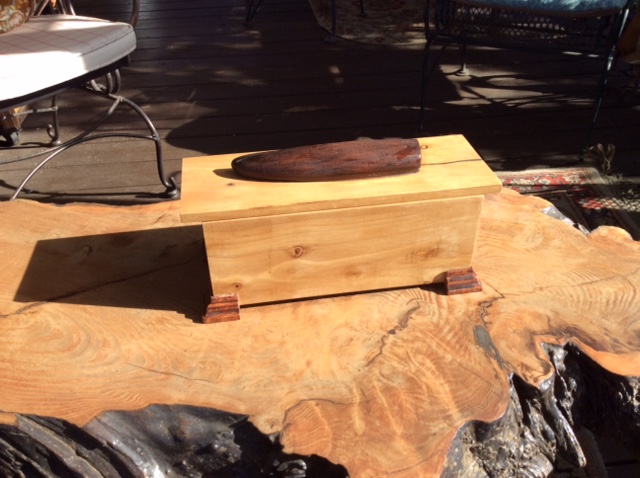
"I milled this box out of a branch from a Japanese maple tree in my front yard."
"
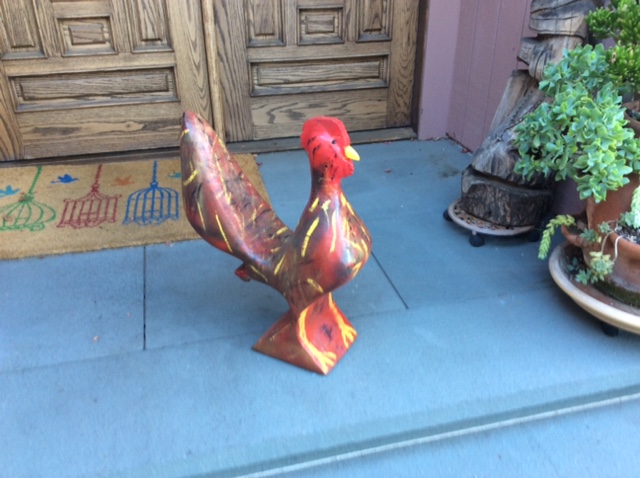
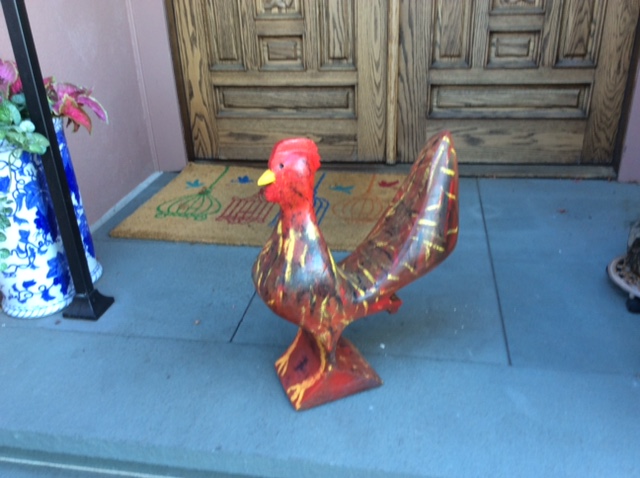
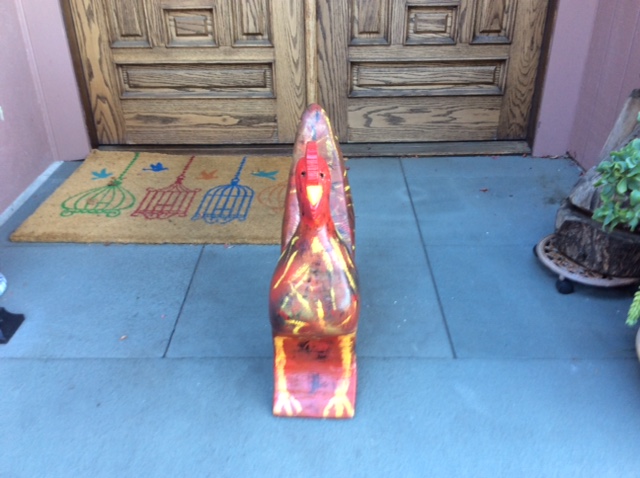
This is a decorative wooden rooster that I made by gluing some cutoff pieces of oak together and then sculpting it into the shape of a rooster.
I am especially proud of my paint job.
John Blackmore
>
(Most pictures not yet available)
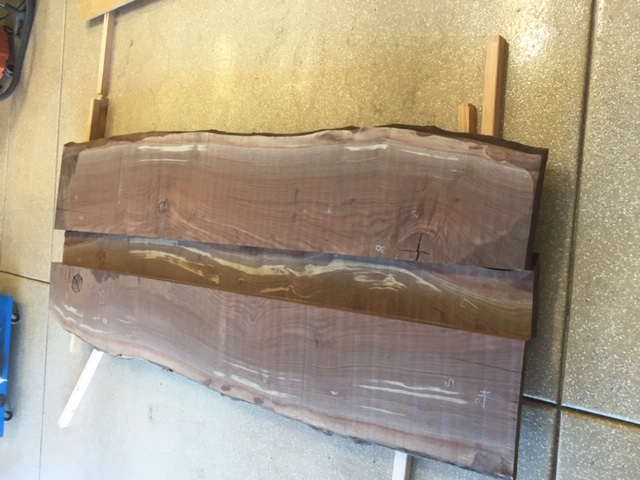
John is working on a dining table.
He got a walnut slab and has been smoothing it with a Woodpeckers slab surfacing router mill.
Lloyd Worthington-Levy

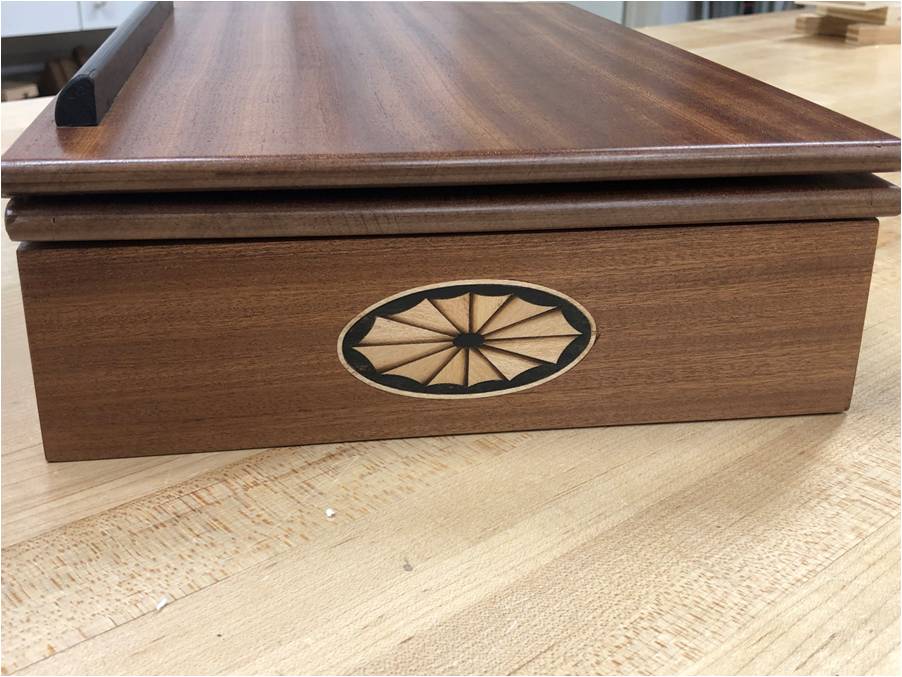
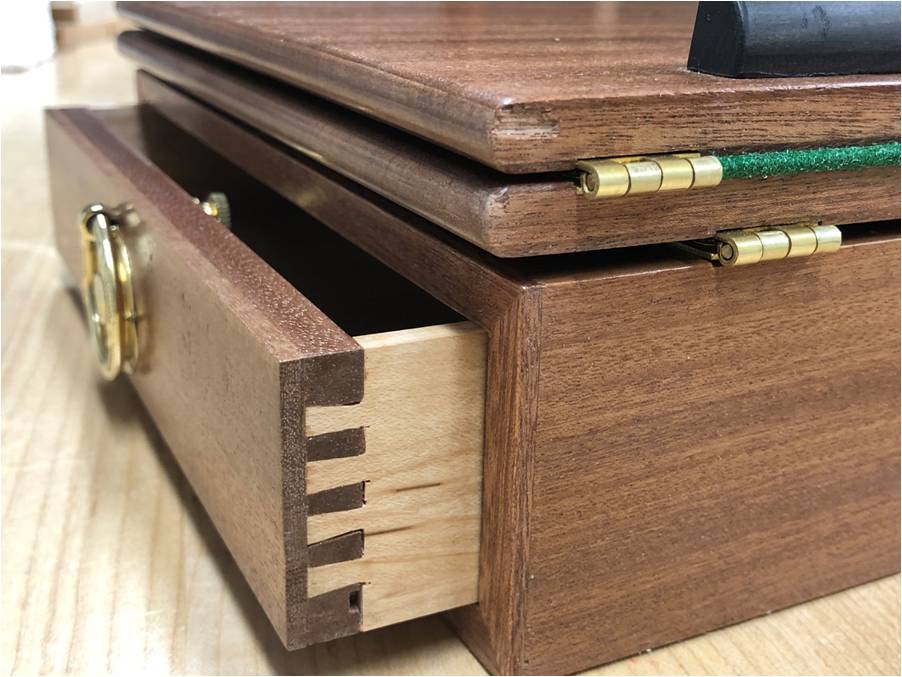
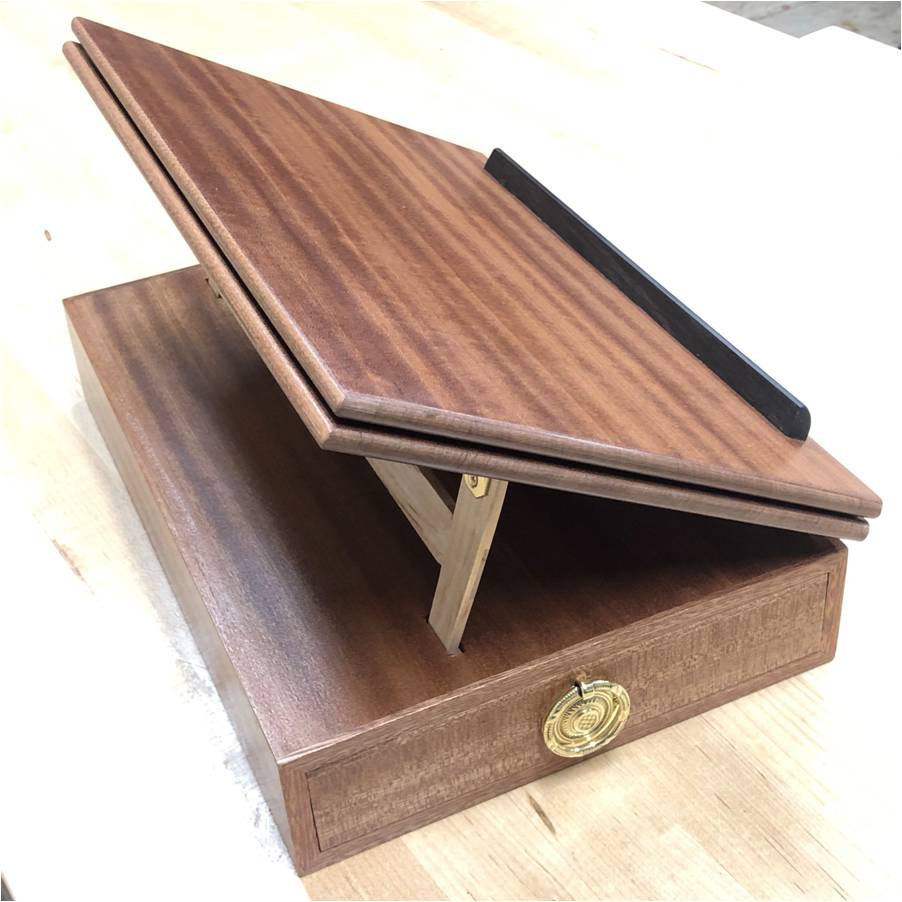
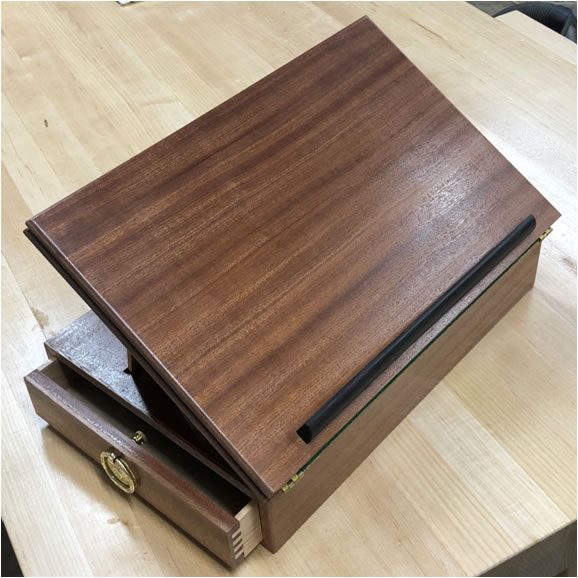
Lloyd made a Jefferson Writing Desk which he finds useful as a stand for his tablet computer. He used a vacuum press and made his own plywood for the project. Joinery was particularly challenging due to the very thin drawer side walls.
Dowel storge
Dowel storage
Harry Filer
"I milled this box out of a branch from a Japanese maple tree in my front yard."
"
This is a decorative wooden rooster that I made by gluing some cutoff pieces of oak together and then sculpting it into the shape of a rooster.
I am especially proud of my paint job.
John Blackmore
>
(Most pictures not yet available)
John is working on a dining table.
He got a walnut slab and has been smoothing it with a Woodpeckers slab surfacing router mill.
Lloyd Worthington-Levy
Lloyd made a Jefferson Writing Desk which he finds useful as a stand for his tablet computer. He used a vacuum press and made his own plywood for the project. Joinery was particularly challenging due to the very thin drawer side walls.
"I milled this box out of a branch from a Japanese maple tree in my front yard."
"
This is a decorative wooden rooster that I made by gluing some cutoff pieces of oak together and then sculpting it into the shape of a rooster.
This is a decorative wooden rooster that I made by gluing some cutoff pieces of oak together and then sculpting it into the shape of a rooster.
I am especially proud of my paint job.
John Blackmore
(Most pictures not yet available)
John is working on a dining table.
He got a walnut slab and has been smoothing it with a Woodpeckers slab surfacing router mill.
Lloyd Worthington-Levy