Mark Ferraro
The Ultimate Steam Box was developed by Mike Dunbar of The Windsor Institute and all credit for the ideas expressed in this article are taken from both the actual use of Mike's ideas and his newsletters, known as the Windsor Chronicles.
My own use of the Ultimate Steam Box has proven to be extremely satisfactory. Most ideas that we see for steam box construction and the sale of steam box systems have several flaws, some just annoying and some potentially fatal. Here are the attributes of a good steam box system:
Safe
Efficient
Easy To Use
Safe -
A steam box is going to get hot, very hot and dealing with live steam is dangerous. Steam boxes made out of stove pipe, metal boxes, wooden boxes and so forth all have drawbacks. If they don't get hot enough to burn you, then they get soggy or worse, melt or sag. There has to be a way to maximize steam volume without the danger of building up pressure that can lead to either an explosion or uncontrolled steam escaping the box.
Efficient -
There should be a way to load and empty the steam box that doesn't require the user to wait for the steam to reach its peak production or allows the wood to be soaked in water. Water is old steam and like old milk, not very useful. It takes live stem to make the steam bending process work.
Easy To Use -
The steam box should be stable, and its heat and water source independent of the loading and unloading of the wood being steamed. After use, the steam box should be easy to empty, dry and store, without any complicated steps.
The Ultimate Steam Box by Mike Dunbar meets all these requirements. Using Schedule 80 PVC pipe and fittings, the pipe is impervious to steam heat, will not absorb water and will dry quickly, ready for storage in a few minutes.
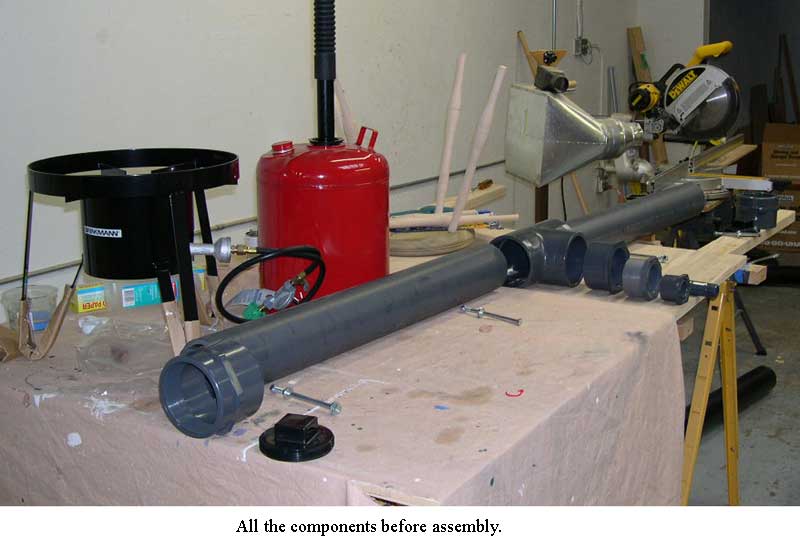
I made mine from 4 inch inside diameter schedule 80 PVC approximately 6 six feet long. Using a schedule 80 tee connection, I cut the pipe into two equal lengths and glued it to the tee. Using a series of reducers, I fitted a connection using 1.5 inch schedule 80 PVC into a standard radiator hose. I chose radiator house as a safety and efficiency issue. With radiator hose, the stiffness of the hose and its wide diameter keeps the path for the steam open under any conditions. The hose leads to a boiler, simply a steel can of 5 gallon water capacity.
As a safety feature, the steel can may not ever have been used to store any oil, gasoline or other hazardous material. I use an oil collection can that is generally sold in auto supply stores with the can, a pipe and a large funnel device to position under an engine. I cut the funnel off the pipe and use the threaded end of the pipe as the connection to the boiler. Any screen in the pipe has to be removed, as the hot steam will cause any screen to rust and eventually, create a blockage problem.
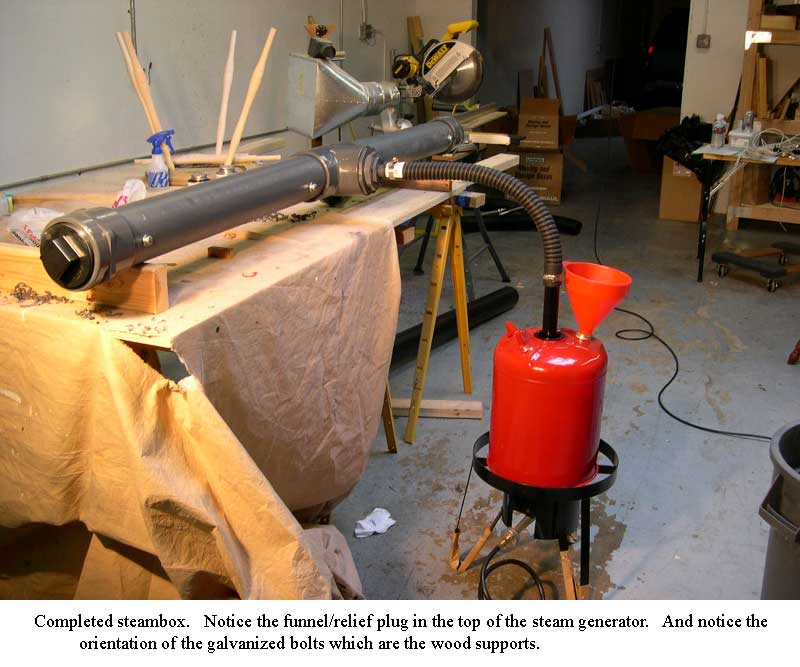
The boiler has to have two unrestricted openings. The supply hose from the boiler to the steam box supplies the steam. The second opening holds a funnel and a cork. The funnel is used to refill the boiler without shutting off the steaming process. It also acts as a safety relief, should something cause the supply line to become blocked.
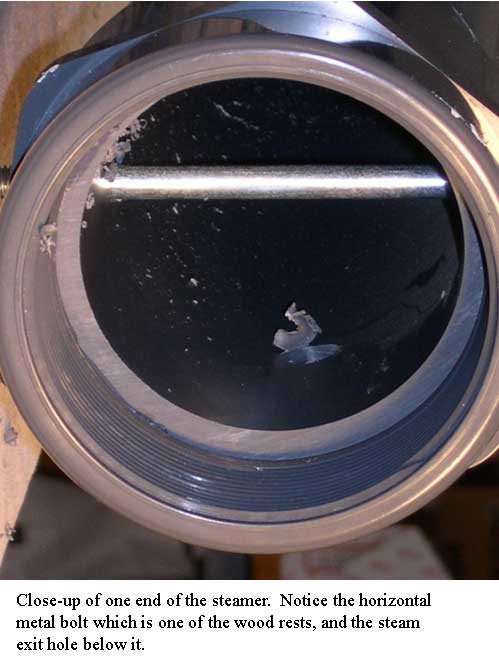
Each end of the steam box tube has threaded end caps attached. These are the ports in which wood is placed and removed from the tubes. Spaced just below the halfway point on the midsection of each tube is a series of stainless steel or chromed bolts. These bolts suspend the wood, so the wood can be completely bathed in steam. Allowing the wood to touch water will lower the temperature of the wood and instead of steaming, you end up soaking the wood.
Two 1 inch diameter holes, one at each end of the pipe, just before the end cap female fittings, are drilled to act as relief holes. They also provide a visual clue as to the readiness of the steam box to accept wood. The relief holes allow water (old steam) to drain without lowering the tempurature of the box. But it also allows a full bathing of the wood in steam.
Wood in this type of box has to be added and removed using tongs or steam proof gloves. No one is fast enough to snatch the wood out of the box before they are burned by the steam.
The steam box has to be level to be used correctly. I built a cradle for mine, so once the cradle is set up, I place the tube in the cradle and we are ready to hook up the boiler. The boiler sits on a propane burner, similar to that used for Cajun Fish Frys or Turkey Fryers. This boiler/steam box has to be used outside, best on a gravel or concrete suface, so as not to ignite any yard materials.
I use my box to steam red oak for Windsor chair parts. This is green wood and has to be shaped, steamed and bent quickly. My shaped parts have to be steamed the day they are formed. Steamed red oak has to be removed from the box and placed in its form in less than 30 seconds. So organization and a clean work area is a must.
Parts to build your own Ultimate Steam Box can be found at electrical/plumbing supply wholesalers and auto supply stores. (Or you can order a kit from the Windsor Institute: www.thewindsorinstitute.com/tools.html. )
I purchased my schedule 80 pipe at State Plumbing Supply, which in located in the industrial area in San Carlos, at 1000 American (at the corner of Bayport Way). State Plumbing was the only supply store that I could find that had schedule 80 fittings in stock. As I recall, 6 feet of pipe and all the fittings came to a little under $80.
For the boiler, I purchased an oil recovery can, with telescoping drip/catch pan from PEP Boys Auto Supply. Before I left the store, I went to the parts counter and asked them to sell me a radiator hose that could slip over the telescoping pipe between the catch pan the the threaded insert. I cut the telescoping pipe to fit my particular set up and fastened the hose at both ends with one band clamp at each end. The 1.5 inch plastic pipe is only a friction fit between the reducer rings in the tee assembly.
Pictures of my construction and set up follow.