President's Message
Fellow woodworkers,
I have spent the last 3 or 4 weeks "playing" with veneer.
I have used veneer in the past but I have always cut my own at approximately 1/16in thick. This is for 2 reasons: I am not very good at re-sawing it much thinner, and I use it on table tops so it has to be thick enough not to be easily damaged. My veneering style may have been closer to parquetry as I cut individual pieces on the table saw and assemble them together.
A while ago I acquired a selection of nice figured and burl veneer and have been waiting for the opportunity to use it. I am currently designing a small cabinet and some jewelry boxes so decided the time was right to try and use my new veneers; I had been to a couple of classes held by BAWA and to the meeting we had on veneering last year – seemed it would be easy.
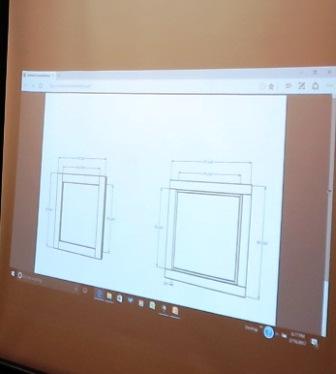
I used Sketch-up for the two veneer designs on the projects, selected 4 veneer samples, and started experimenting.
First I remembered the advice to cut on a 6-deg bevel but quickly realized this was not appropriate as the 6 deg rule was designed for cutting inlays into a master sheet –my designs have all straight edges with no backing sheet as such; so I planned to cut them a straight-line by straight-line at a time.
I also found cutting the thin veneer with my regular scroll saw blades did not work as the cutting action was too rough and I could not get clean cuts – so I invested in Size 1 and Size 2 blades from Grizzly. I bought both the flat and the spiral blades thinking that the spiral blades would be good for cutting tight corners but their kerf was too wide so they will be useful if I ever get around to making 1/4in thick jigsaws, but that is not currently in the plan.
About this time I measured the thickness of my veneer: 0.020 inch – which seems very thin but checking the web it is about the standard commercial thickness.
As I was cutting the veneer, especially the burl, it was shattering at the back so I tried sticking clear packing tape on the back; this helped with the cutting, but was not easy to remove after cutting as my pieces were fairly small. To help alignment I also tried cutting 3 or 4 layers at a time using blue tape on the edges, but this did not work as the sheets were not held together in the middle and I still had trouble with the burl breaking. I tried using double-sided tape to overcome this problem but then could not get the double-sided tape off.
I then moved to cutting one layer at a time with a knife and a guide. This almost worked but by this time I had packing tape on the back of the sheet and a print of the pattern glued onto the surface with Scotch Adhesive Spray. The biggest problem was removing the Scotch Adhesive holding the pattern in place. Next in the evolution of this work was to trace the pattern onto the veneer using carbon paper; this was better but still difficult to avoid breaking the 30 -deg corners on some of the veneer shapes.
At this time a BAWA friend of mine loaned me a very nice old fashioned wooden guillotine which worked, most of the time. Guillotining the veneer was OK but sometimes it was difficult to chop the backing tape, especially on the fragile burl: the tape would not always cut so it tore the veneer as it folded down instead.
I am not yet at the end of the possibilities; I'm considering things like laminating a backing on to the decorative veneers or trying to make a set of steel punches for the very limited number of shapes as there are plenty of old saw blades lying around the workshop – I may persevere and get to a solution - or I may just go back to cutting my own thick veneer.
Enjoy your woodworking
Frank (Contact at: Frankramsay8@aol.com)
President Frank Ramsay called the meeting to order at 6:05 PM
Announcements:
Status our 2017 program so far:
March: We will have a talk by Steve Baumar on Finishing, as well as a Tech talk by Ken Napior on Classical Furniture Styles.
April: The talk will be by John Sauer on woodturning using a special lathe.
May: Mike Bray will speak and we will have another tech talk by Ken Napior.
June: Still open.
July: Torin Brandborg will talk about furniture making.
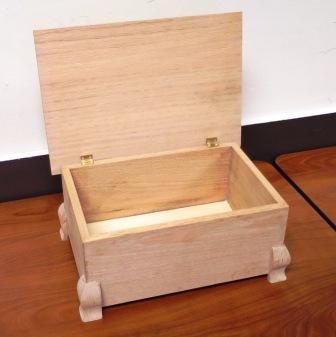
John Blackmore reported on the box-making workshop held at his shop on February 4th. 6 members showed up to work on their boxes and 2 came back a second time to finish theirs up.
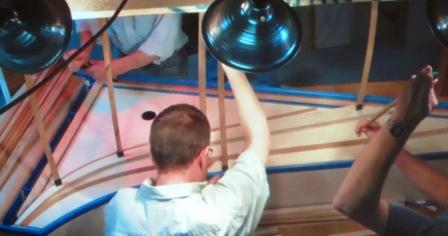
Steve Rosenblum gave a status report on the fabrication of the 11 Oak window sashes for the Matthew Turner Educational Tall Ship in Sausalito.
Steve and Mike Downing met at Mike Bray's shop for a full day and cut the wood to final dimensions and tried a glue up of a test piece. As a result we decided to modify the glue up by using dominos in the corners of the frame in order to keep it square during glue up. We are planning to glue all 11 frames on March 4th and are planning to round up 88 clamps to allow us to do so since the epoxy, West 655, takes about 4 hours to reach working strength and 24 hours to reach full strength.
Bruce Powell announced that name tags for all members were available on the back table and that people should wear them during the meeting and return them at the end.
Featured Speaker:
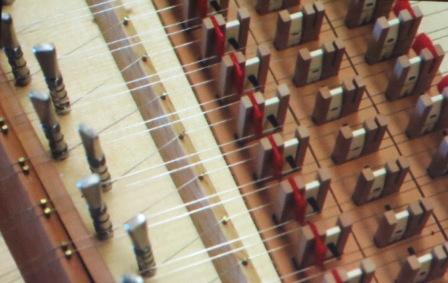
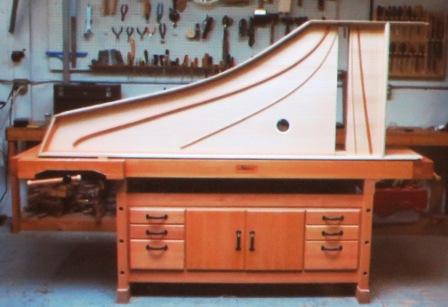
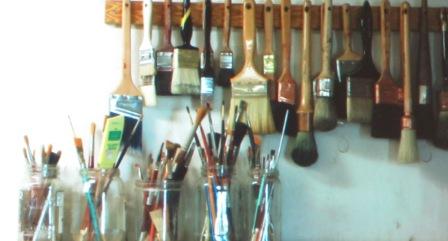
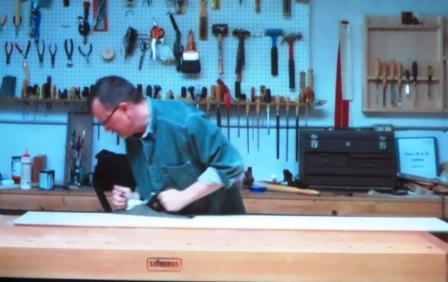
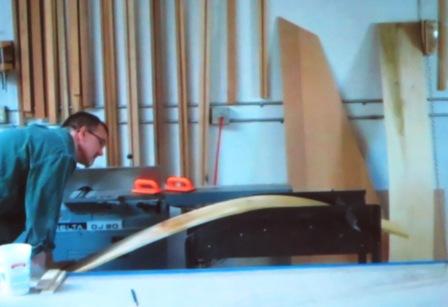
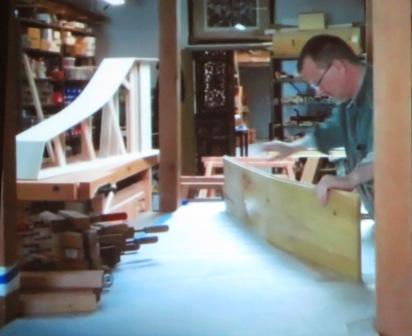
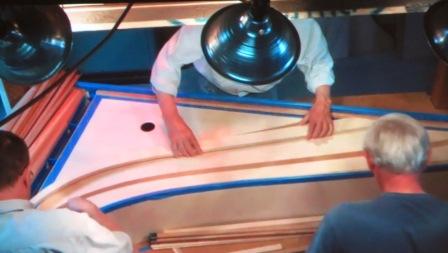
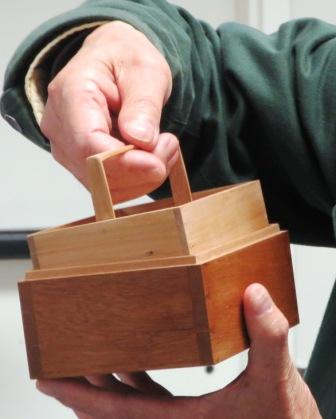
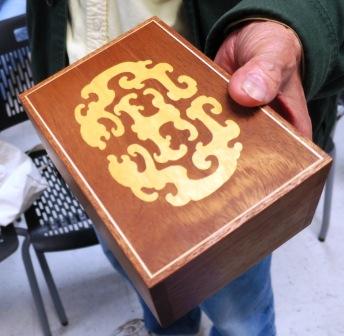
Per then introduced our speaker, Kevin Fryer, to talk about making harpsichords. He started out by giving a short history of the instrument. It was the original keyboard of the period from 1500-1800. There were 5 schools of builders during the heyday 17th-18th century. Kevin builds the Flemish Booker type. By 1860 the fortepiano was beginning to take over. The harpsichord was in limbo during much of the 19th century, but received renewed interest at the beginning of the 20th century when people tried to build modern versions called plucking pianos. By 1960 people realized that the traditional instruments sounded better and tried to recreate them. Kevin came to San Francisco as a voice student. After building a harpsichord kit he realized that this was his calling. He took some woodworking classes and became a rep for the kit company, Zuckerman Harpsichords. He also became the manager for the Harmonia Baroque where his duties included harpsichord maintenance. Case on bench. Kevin's brush collection. Planning sound board. In 1990 he moved into a shop in the Bayview Industrial Park and quit Zuckerman. There he started building harpsichords from scratch. Modern builders are continually trying to understand the technical issues in getting the best sound. The latest trend has been to try to replicate the old wire drawing methods so that the proper impurities and defects can contribute to the best sound. In the past Delrin plastic has been used for the picks, but builders are now going back to using goose quills because they give a better sound. There are now about 20 Harpsichord makers nationwide. Kevin supplements his construction of new instruments by making repairs and tuning. Kevin then proceeded to show several videos. Bending the wet side over hot plate Checking bend against drawing. The second video demonstrated a sound board installation. He uses Titebond glue for construction joints but only hide glue for the soundboard installation, so the assembly must be done in less than 2 minutes by a gang of 4 people. He uses a gobar deck to apply clamping pressure. Installing sound board. Gobar deck. The final video showed the painting of the case using tromp l'oeil techniques using stencils and pounce brushes to remove paint. The result is a surprisingly 3D looking design. His keyboard top plates are made from cow bone. Millicent Tompkins, who is now 86 and lives in Marin, paints his lids. Frank announced a 10-minute break at 7:45 To see more of Kevin's work go to: kevinfryer.net You can find his videos are on Youtube if you search under "Kevin Fryer harpsicords" After the break, Harry Filer showed the box he had made in the workshop at John Blackmore's house. He praised the facilities and the hospitality of John to all the participants. His box was made of red oak and uses the lock miter joint. The plywood bottom is installed in a rabbet in the bottom. Yeung Chan showed a small box with a marquetry lid that he made while on a trip to China to train Chinese people in woodworking technique. He also announced several classes at the College of the Redwoods. The beginning of the application period was February 1 for classes beginning in May. Among the classes are toolmaking and joinery taught by Jim Budlong and tool making and machine joinery by Yeung Chan. Finally Ray Burger showed a birdhouse he had built to encourage our feathered friends to thrive. Stephen RosenblumSecretary
steve@rosenblums.us